
This tutorial show one method for attaching your textile art to a stretched canvas in a way that allows for the work to be easily removed later if desired. Experiment and see what works for you. There are many options available.
Background
For a while now I have been wanting to try mounting my small textile art pieces on stretched canvas to make them more user-friendly and approachable for collectors. Helen Conway, Lyric Kinard and others share useful tutorials for wrapping stretched canvases while both Deborah Boschert and Cindy Grisdela outline some glueing methods in their recent books. Others suggested double-sided tape but I wasn’t sure how long it would last. I wanted to keep my options open, so I went looking for a stitching method that allows for the work to be taken off later whilst remaining intact.� I sought help via Facebook and Instagram. Thank you to everyone who responded, especially Lisa Call, Jennifer Corkish and Carolyn Collins who confirmed that stitching is possible and provided encouraging tips.

Tools and materials:
 Completed textile work
- Stretched canvas – more details below.
- Acrylic paint in desired colour
- Foam brush
- Awl (optional)
- Large sharp needle eg Piecemaker embroidery needle
- Clear monofilament thread such as MonoPoly
- Scissors
- Ruler
- Chalk pencil (optional)

Preparation of Textile Work
A faced work has a clean edge and can be sized to sit flush with the edge of the canvas. As shown in my list of Alternative Quilt Finishing Tutorials, there are many different ways to face a quilt.
 The following photos give a glimpse of my Wholecloth Facing Tutorial:


This work already had a hanging sleeve. I left it on in case I ever wish to detach the work, but otherwise I wouldn’t bother. The facing edge is one inch deep. See my Mitred Facing Tutorial.

Preparation of Stretched Canvas
Choose a stretched canvas that is the same size or larger than your textile work.
I used a J.Burrows 12x12in 380gsm gesso primed canvas that I picked up on sale at Officeworks recently (2 pack for $5). I am new to canvas shopping but this turned out to be a good choice as the stretcher bars taper in at an angle so that you can almost reach the edge of the canvas easily with your fingertips and a needle. (It’s hard to photograph!)

By contrast, the solid wooden frame on this Rico canvas makes it difficult (impossible?) to stitch within the 1 1/2 in perimeter of the canvas without special tools.

Paint the sides and edges of the top of the canvas with acrylic paint. You don’t need to paint the whole canvas top as it will be covered. (Looking at how the staples have corroded on the back of that Rico frame that is still wrapped in plastic, it may also be desirable to seal the staples for longevity. Does anyone have any practical experience on this? Living by the ocean, everything rusts!)
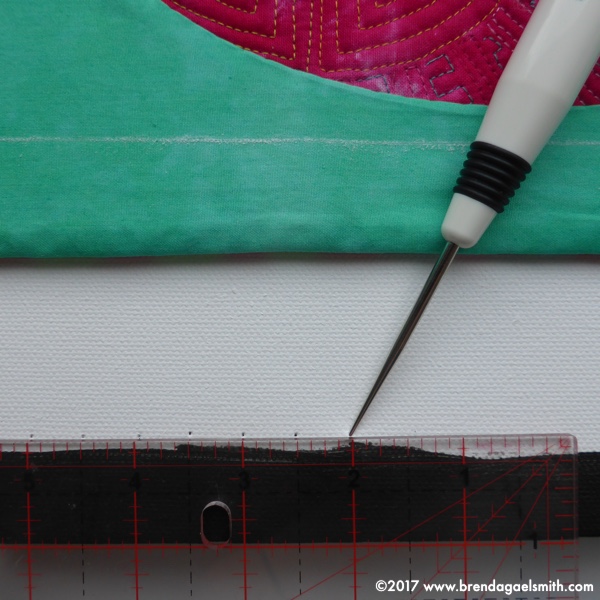 Using an awl, needle or other sharp device , pierce small holes in the canvas at half-inch or desired intervals around the edge of the canvas. These holes are for coming UP with the needle from the back of the canvas.
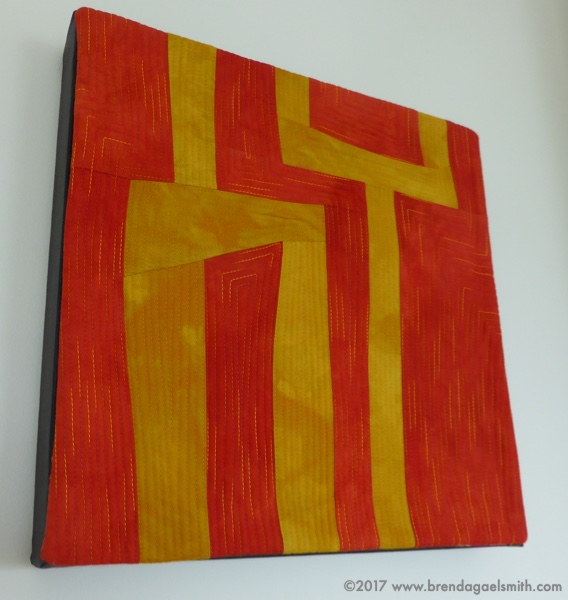
For expediency, my holes are positioned one inch in from the edge of the canvas to match the one inch depth of the facing on the back of my orange textile work (see below). For the green textile work, I marked chalk line at 1 inch from the edge (see above) but you might like to go closer. Alternatively, you may choose to eyeball it as you go but I find the pre-piercing and marking helps me keep things straight.

Attaching the Textile Work
Thread the needle with monofilament doubled and knotted at the end. Since monofilament is “invisible”, these diagrams show heavier coloured thread for illustration purposes only.
The first step is to securely anchor the monofilament in the textile work. It’s slippery stuff and can be tricky. To bring it under control, take a small stitch through the facing layer or the back of the textile work taking care that nothing shows from the front. Guide the needle between the two strands of the monofilament and pull tightly. Repeat if required.
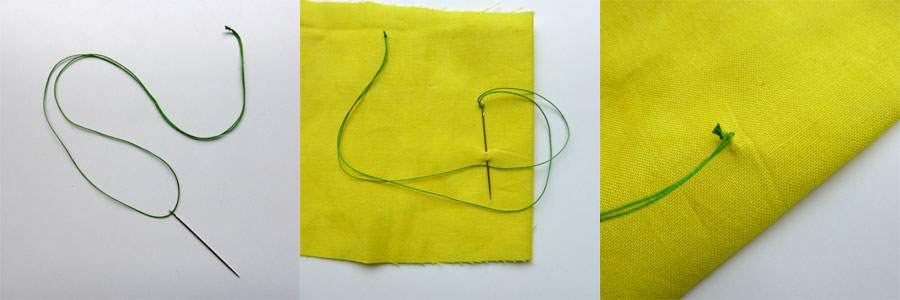
I anchored the thread one inch in from one of the corners.
 After anchoring the thread, push the needle DOWN through the canvas one inch in from the corner.
Continue with a running stitch through the facing layer in a straight line so that the edge of the textile work aligns with the edge of the canvas. I used a small quarter inch stitch, coming UP through the holes pierced with the awl and putting the needle DOWN in a fresh hole half way in between. Next time, I might try a wider spacing. Experiment and see what works for you.

To keep things taut, every so often I back-stitched and knotted off the thread by looping the monofilament over the front of the needle and pulling the thread tightly through.
 Using invisible monofilament thread ensures that the back of the work is neat and tidy. The stitching remains accessible and the textile work can be easily released and removed if desired.

From the front the canvas is scarcely visible and you cannot see the the stitching:

Now that I am happy with this practice piece, I am going to work on my first completion for 2017 – Pigface (12x12in):


Rebecca Staunton says
Thank you very much for sharing this tutorial much appreciated.
Ali George says
Very helpful Brenda – as always.
Karen Hoffman says
Thank you for sharing your knowledge.
Susan says
This is terriffic! Thank you for sharing it, and happy new year!
Jennifer Corkish says
Great tutorial Brenda
Kathie Kerler says
Thanks for posting this. It’s helpful to have options.
phillippa lack says
Another alternative…My mentor Gay Lasker uses felt as the backing for her pieces, then sticks the ”stickier’ part of velcro to the edge of her stretched canvas, after painting the edges. The felt backing holds to the velcro really well, and is easily removed.
Brenda Gael Smith says
Thank you for that suggestion Phillippa. I have heard of that method and a similar one where the work is first stitched to foam core board and then then board is glued to the canvas. In my case, I wanted to avoid any extra bulk but it’s good to have options 🙂
Mel says
Thank you! And I love the beautiful quilt used in the demo! What gorgeous colors and textures!!