
This tutorial sets out seven five easy ways to resize images.� It concentrates on my go-to photo-editing tools – Photoshop Elements and the Photogene iPad app – but also covers free photo software� GIMP,� Irfanview, and Picasa 3 and some built-in features of Microsoft software and Macs. As this is a long post, here is a table of contents so you can skip to the section most relevant to you:
- General Guidelines
- Photoshop Elements
Photogene- GIMP
- Irfanview
Picasa 3- Microsoft Windows
- Macs
- Other Useful Resources
General Guidelines
Image resizing is a basic skill that I use in my creative practice most days.� It’s essential for “optimising” images for e-mail or online use; preparing high resolution images to submit for publication or exhibitions; and making a digital mock-ups (to scale!) of exhibitions I curate. Before I look at the photo-editing tools, here are some general guidelines to keep in mind whatever method you use:
- For greatest flexibility, set your camera to a medium to large picture size (eg 2560×1920 pixels+) rather than a low resolution/web size (eg 640×480 pixels).� You can always reduce the size of large images by “downsampling” (removing pixels) but enlarging small images by “resampling” (adding pixels) will typically degrade the image quality.
- Always save your original image in a safe place and make your edits to a copy.
- DPI (dots per inch) is a printing term and causes confusion. Regardless of whether an image is going to be used online or in a print publication, it is good practice to use the pixel resolution (eg 800x600pixels) to describe the size of a digital image and not worry about DPI or PPI (pixels/inch).
- For e-mail or online use, set the longest side of your image at say 600 or 640pixels. This “optimisation” will enable the image to be displayed on most screens and devices without scrolling. It will also ensure that the image loads quickly and does not drain the bandwidth for you or your viewer.
- Higher resolution is required for print purposes so that the image is not pixellated. Check with your printer/publisher as to the minimum dimensions expressed as pixels.
1. Photoshop Elements
Photoshop Elements,is an economical, yet powerful, alternative to Photoshop.
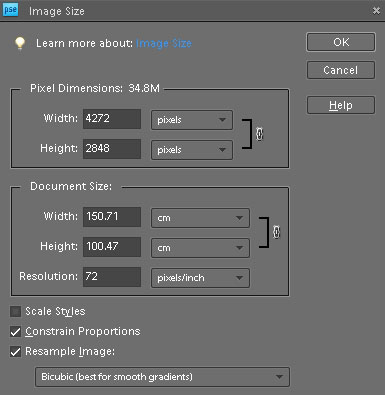
To resize, go to Image>Resize>Image Size This “Image Size” screenshot shows that the original image is 4272 x 2848 pixels (3MB+).
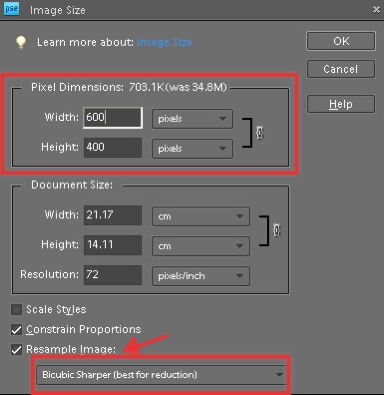
 To “downsample” (remove pixels) to create a smaller image, set the pixels dimensions and ensure that the “Resample Image” box is checked. (As a general rule, also select “Bicubic sharper” when making the image smaller.) Click OK.
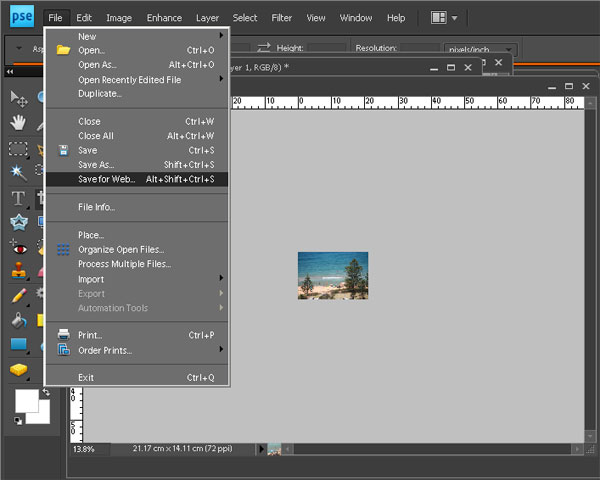
 Then go to File>Save for Web for a web image (otherwise, use File>Save As>FileName>JPG>Save)
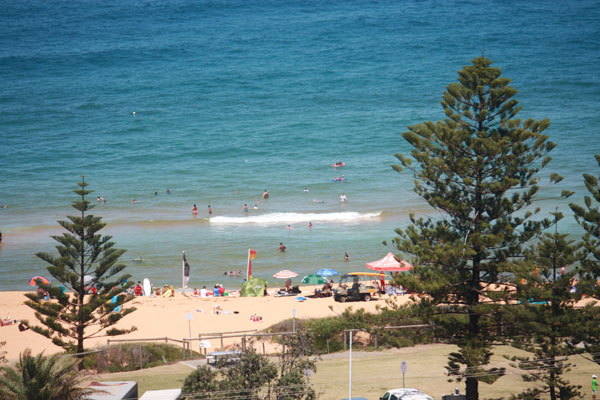
 This shows the resized/downsampled image at 600×400 pixels (less than 100KB):
2. Photogene – no longer available
There are numerous robust free photo editing apps for the iPad but I have never begrudged paying the modest extra fee (A$2.99) for the extra functionality of Photogene. In particular, when am travelling and teaching, I regularly use the export/resizing and watermarking features to optimise file image sizes for online use and sharing generally.
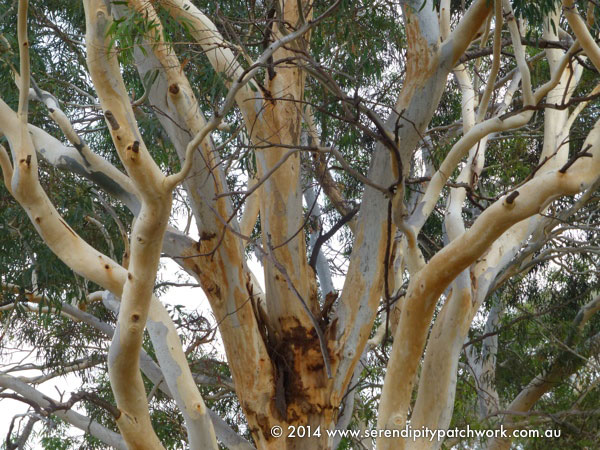
The original image of this gum tree is 2560×1920 pixels (2.79MB) which is way too big to use on my blog.� In Photogene, go to Export>Resize� (In this example, I also have the watermark feature turned on but this is optional.)

Set the size of the longest side at 600 pixels (the default DPI in the lower section is 72 which is standard website resolution).

Save to Library, e-mail or desired destination. Here is the resized/downsampled image complete with identifying watermark.
3.� GIMP
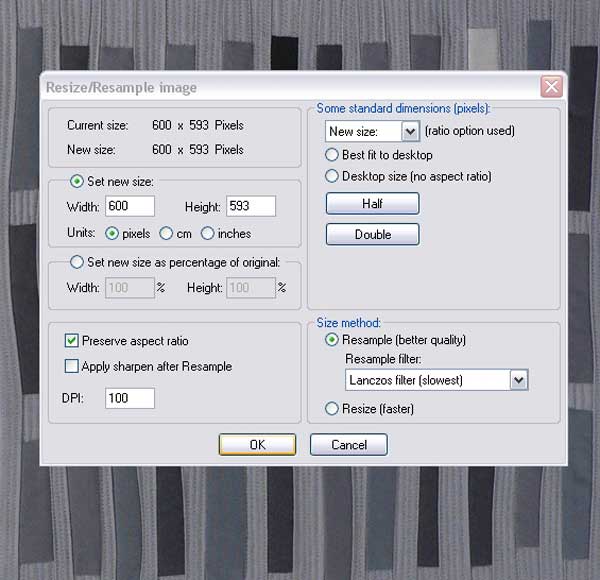
In GIMP: Go to Image>Scale Image>set desired dimensions and resolution>Click Scale>Save As

4. Irfanview
In Irfranview: Go to Image>Resize/Resample>set desired dimensions by size or percentage and resolution>OK>Save As

5.� Picasa 3
You can reduce picture size in Picasa 3 by exporting, emailing, or uploading your photos to Picasa Web Albums.� (See: Picasa help guide) The screenshots below highlight the export process.
File>Export Picture to a Folder>set desired dimensions and image quality>Export

6.� Microsoft Windows
Depending upon the vintage of your PC and Microsoft software, there are various built-in tools for resizing images including:
- How to Resize an Image in Paint (Windows 7)
- How to Resize Images Using Paint in Windows 8
- Resize your pictures with Microsoft Picture Manager
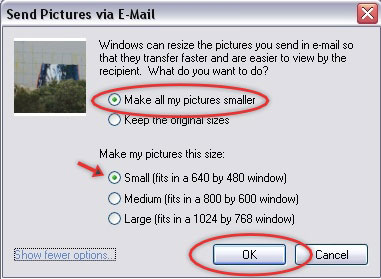
- Rough & ready resizing with Outlook e-mail program:
- Open image file in Windows Explorer
- Right click Send to>Mail Recipient
- Send Pictures via E-mail prompt>Make all my pictures smaller>set desired size> OK
- Send e-mail to yourself and/or save attachment with a new name

Mac
Resizing an image on a Mac is straightforward and requires no extra software other than what comes with the computer. See this step-by-step Wikihow tutorial How to resize Pictures (For Macs)
Other useful resources:

- Digital Essentials: the quilt makers must-have guide to digital images, files and more! (affiliate link) a book by Gloria Hansen
- Preparing Images for PowerPoint, the Web, and Publication (PDF) – comprehensive research guide by the University of Michigan
- Understanding DPI and Pixel Dimensions Information Sheet prepared by www.iprintfromhome.com explains how prepare your images for print publication purposes.

vicki miller says
Great turorial! I have bookmarked it for sure!
Brenda Gael Smith says
I hope you find it helpful Vicki!
Neroli says
Great tute Brenda. I read it just to see what you’d put together, given I know how to resize…but I’d never heard of Photogene so am now downloading it so I have something to watermark from my phone! Previously I only watermarked images shared from my Mac. Very handy, thanks!
Brenda Gael Smith says
I have tried out so many photo editing apps on my iPad Neroli and Photogene is the one that I use most. I hope you find it helpful.
Candy's Home Patch says
Thanks Brenda. I have used Photogene since your original recommendation.
I love it for the ease of collage. I only realised recently that you can turn the watermark on/off. Another quick resize I use is to email the image but select small in the email, drag from email onto desktop & post from there.