
In Part One of the Evolution of Allagai Waves, I looked at the design and construction of the latest work in my Dreamlines series that is currently on exhibition in Golden Textures. In this post, I will concentrate on the quilting and finishing of the work.
 Once the quilt top was assembled, the next step was to sandwich three layers together: the backing fabric; poly-wool batting and the quilt top. As I am not a fan of safety pin basting large works (the pins get caught up on everything and the layers sometimes move), I have used a light scattering of fusible webbing to hold the layers together.

The backing fabric is a suitably beachy print and I feel virtuous because I am at last using fabric purchased more than a decade ago:
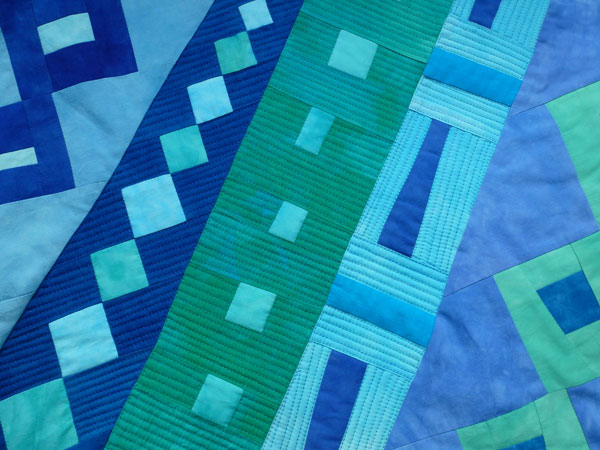
 For all sections, except the strips with large diamonds, I intensively quilted in a linear pattern at 1/4-1/8th in intervals using the edge of the open-toed dual feed/walking foot as my guide. This involves physically stopping and turning the quilt 90 degrees for every single line of quilting. It’s slow going – sometimes medative, sometimes not.
 I’m enjoying the extra workspace on my new machine and the knee lift and needle up/needle down functions are my friends (although I do miss the foot tap functionality of my earlier Bernina machine).
  There are a couple of variegated threads but otherwise, I used colours to blend with the hand-dyed fabrics. That’s a lot of different coloured threads!
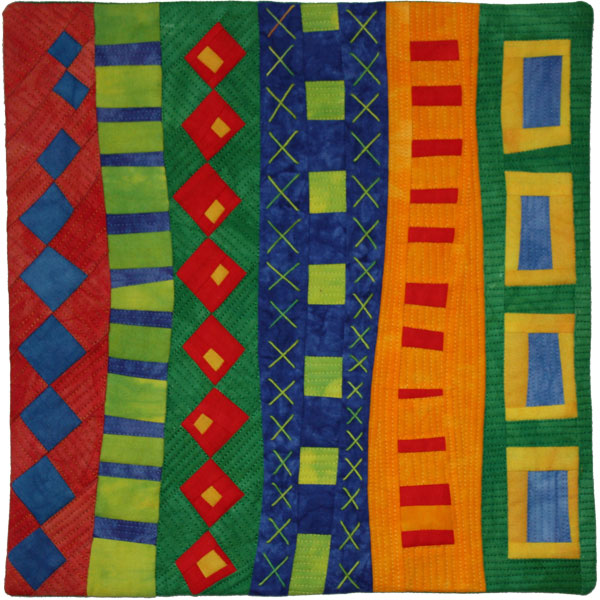
I had planned to include more hand-stitched cross stitch elements (a la Dreamlines #3 and Dreamlines #4) but it not enhance the design. High contrast embellishments made the composition busy and detracted from the air of rhythmic calm. Ultimately, the only hand-stitching is a subtle variegated outline to the seafoam green diamonds. In this detail shot, you can also see the foamy bubble motif that I used in the background of the three strips with large diamonds. The bubbles are much quicker to quilt than lines!
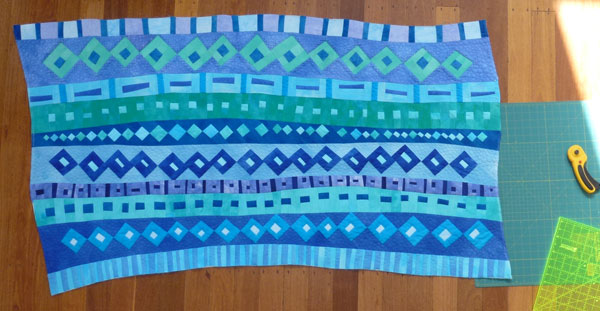
 Once the work was quilted, I trimmed the top and bottom to retain the wavy outline. It was obvious that the fine turquoise and blue striped edge was too curvy to adequate support a hanging rod and so the piece was rotated 180 degrees from the way it had developed on the design wall:
 The next challenge was how to deal with the left and right hand sides. This involved much crawling around on the floor, measuring, chalk marking; playing with image editing programs on my iPad and even making printouts and trimming up by hand with scissors. I did contemplate cutting the sides straight but this seemed to diminish the energy and movement of the piece:
 Working on the theory that I could always trim the piece later, but I could never reattach any offcuts, I opted to maximise the size of the work and the arc of the curves within the body of the work available. The final work measures 83 x153 cm HxW (32 1/2 x 60in) which is just a few centimetres deeper than the indicative size I specified in my original expression of interest.
 Finally, I used My Favourite Facing Finish to face these gentle curves; made a sleeve and attached a label created in the same way as set out in my Printed Quilt Label Tutorial.
All up, accordingly to the report from my Harvest time recording, this work took me 90 hours to complete from the first rotary cut to the last stitch: approximately 42 hours piecing and 48 hours quilting and finishing. However, I take this a a rough guide only. It doesn’t include my dyeing days and there were many hours of hand stitching and thread burying that did not hit the timesheets. Also, there were occasions when I would pause the timer and forget to restart.
This is the third work that I have made work for a specific exhibition pursuant to an expression of interest selection process, albeit this time my concept design was rather loose. (You can read about my previous experience in making Regrowth and Hope, Promise, Bounty: Reap What You Sow for the Regeneration exhibition in 2012.) I am comfortable with the discipline and commitment of this process. It helped to provide structure to my studio practice and I really appreciate the gallery and exhibition organisers providing a forum for artists to create and exhibit new work. However, for me, it is also important to set aside studio time for serious study – something that is more than playtime but without the pressure of creating an “exhibition worthy” work in a particular time frame. I have earmarked several blocks of time in 2013 for exactly this. In fact, I am off to the studio right now!

Kristin L says
Pretty!
leanne says
I am seriously in awe of your view from your sewing room – what an inspiration !!