This tutorial sets out one method for preparing washable, printed labels for quilts and textile works. I have tried lots of methods and products and find this method quite efficient, reliable and economic for my purposes. (Some people may not like the plastic sheen and texture of the transfer.) You will need:
- Epson Iron-On Cool Peel Transfer Paper available Australia in A4 sheets from Office Works;
- a PC with Word and Paint applications or equivalent. (You could do this entirely within a photo editing or graphics application but, for this tutorial, I am using tools that are standard on many computers.);
- an inkjet printer; and
- white or light coloured fabric (at least 50% cotton).
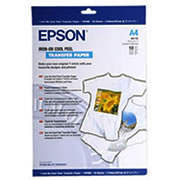
Step 1: Create Label in Word Document
Type your label text in your desired font and size in a Word document. I like to use a bold, non-serif font. For optimal economy, I try to fit the label(s) across the full width of the A4 document. Sometimes I insert an image of the quilt too. Highlight and right click copy the label.
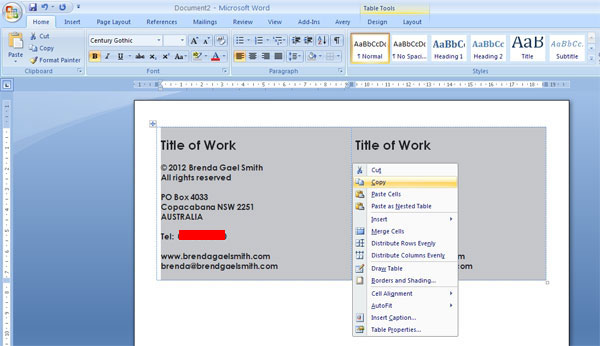
Step 2: Set Up in Paint
Open up the Paint accessory on your PC and set up the page to match the size and format of your label. In this example, I selected A4 format with narrow margins and unchecked the horizontal and vertical centering options.
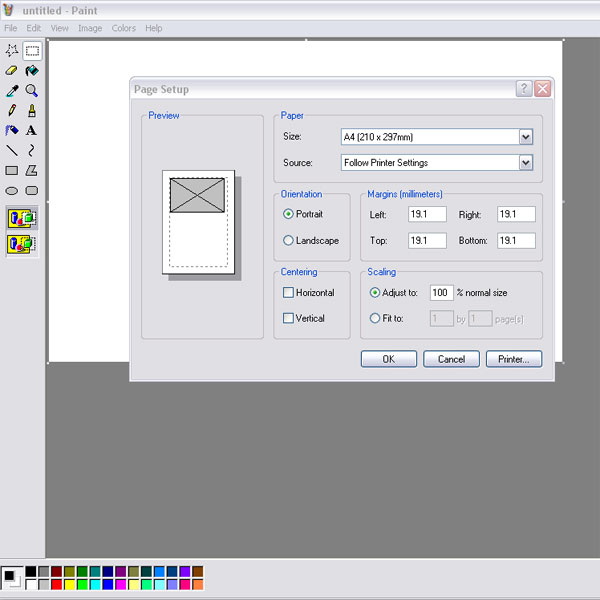
Step 3: Paste Label from Word into Paint
Right click to paste the label into Paint.
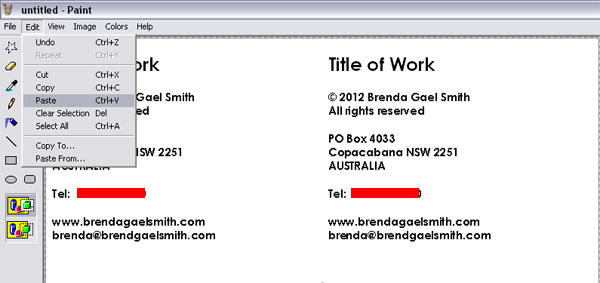
Step 4: Flip the Label
Click Edit>Select All>Copy
Then click Image>Flip/Rotate>Flip Horizontal
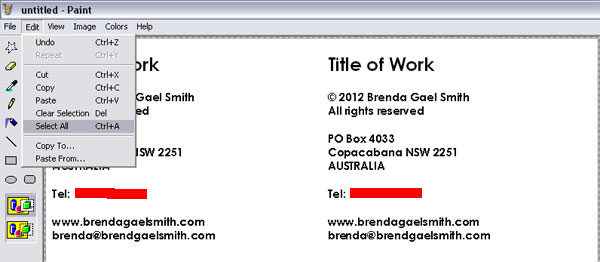
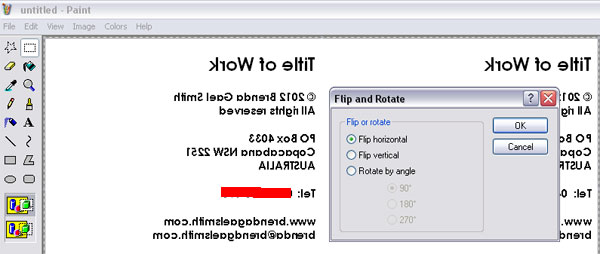
Step 5: Copy the flipped label back into Word & Print
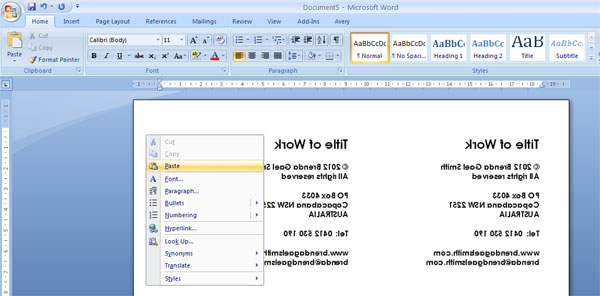
You may be able to print the flipped label directly from Paint but I found that, depending on the printer page settings, the labels sometimes printed out in unpredictable locations. Instead, I like to copy the flipped label (which is now a graphics file) from Paint back into Word and print from there.
In Paint: Click Edit>Select All>Copy and then right click paste into a Word document.
Test print on paper before printing on the Epson Iron-On Cool Peel Transfer Paper on an inkjet printer. Take care to print on the right side of the transfer paper (the reverse side is clearly labelled). The label will be inverted (mirrored/wrong way around) before ironing.
Step 6: Trim the Printed Label
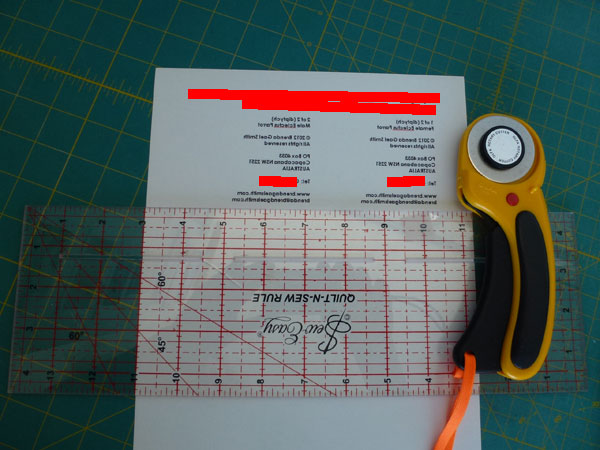
Because of the surface of the transfer, I like to trim the label quite closely to the text. A clean horizontal cut across the page also means that used balance of the transfer sheet can be used for future labels with minimum wastage.
Step 7: Iron On the Label
If you are brave, you can iron the label directly onto your work! However, a safer approach is to place the label, image size down flat against the material you want to use leaving a perimeter of at least 3/4 in on all sides. Then apply a hot iron to set the image in accordance with Epson’s instructions. For a neat edge, iron a 1/4in fold of the perimeter fabric to the back of the label BEFORE removing the transfer paper (see label at right below).
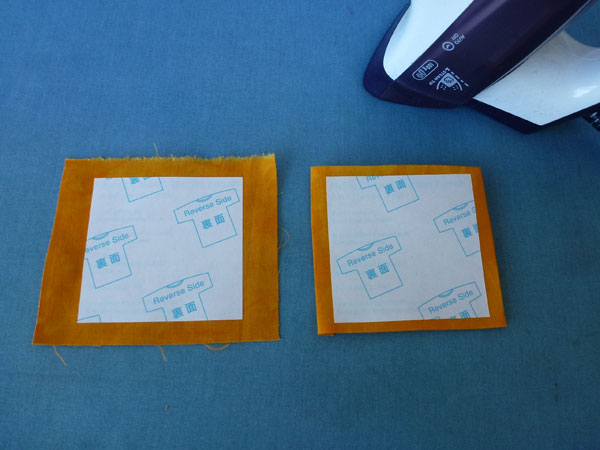
Step 8: Cool Peel the Transfer Paper
Wait for the label to cool and then gently peel the transfer paper off. Your label is now ready to hand stitch to your work.
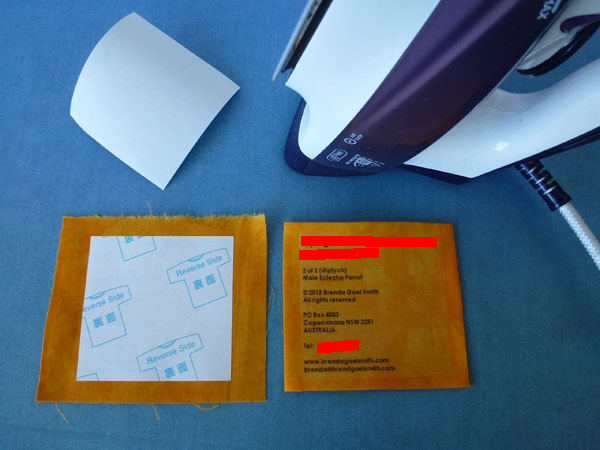
I hope this tutorial saves some readers from quilt label headaches. What is your favourite method for labelling your textile work?


Al says
A clear and logically written tutorial, thanks Brenda! 🙂
Mary Beth Frezon says
I print directly on commercially available prepared for printing fabric. No flipping of image etc required. Iron it onto a piece of freezer paper, trim to the seam allowance and iron the edges under and I’m ready to sew.
Like all small tasks things like this often loom as odious but when you’re doing them they don’t take so long. I try to have the label ready to go while sewing down the edges and sleeves so when I get to the bottom sleeve I can “take a break” to sew the label on and know that I’m really close to being done.
Brenda says
Mary Beth, I am glad that you have found a method that works for you. I agree that printing directly onto fabric eliminates the need for flipping the text but my results with such products have been rather erratic. Reasons I don’t like fabric sheets so much include:
– with or without freezer paper backing, my printers frequently jam or feed fabric sheets crookedly. Often the sheets would not feed at all but the printer would still print and leave an inky mess;
– my printer does not deal with partial sheets very well so there was lots of wastage;
– some products come with backing that is difficult to separate and peel off;
– some products are stiff and plasticky to sew;
– I don’t have a local supplier of fabric sheets (whereas I can get the transfer paper at the stationery store); and
– fabric sheets are white but I like my labels to be more colour co-ordinated.
I got so frustrated with the expense and wastage of fabric sheets that I bought a big bottle of bubble jet treatment so I could prepare my own fabrics but I never used it! That’s my experience with fabric sheets. Your mileage may vary.
D F says
Your idea about encouraging people to get labels on quickly and without all that moaning and groaning is valid. Just do it! There will be a million and one variations since there must be that many quilters out there.
I have had good luck with small labels by printing the label first on plain paper, then taping the fabric on all four sides on the printed area leaving room around so that no printing hits the tape (hold it up to the window or a lightbox to be sure).
I use an Epson with Durabright ink and it doesn’t wash out or require fixing.
The bubble jet thing never worked well for me.
Brenda says
Diane, taping the fabric onto paper is a great tip. Thank you for stopping by my blog to share.
Mary Vaneecke says
I use a method very similar to yours for all the same reasons. My current preferred product is called ‘Transfer Artist Paper’ and is available through C&T publishing.
Linda says
Great idea!
I’ve used prepared fabric before but it only comes in white or off-white and I’m too lazy to use Bubblejetset. Coloured labels – yippee, and thanks!
Linda
vivian helena Aumond-Capone says
just found your site from SAQA… Sometimes I print the label on paper, hold it up to the window and trace my words on to fabric… I hate also wasting a piece of paper, but like some of my fabric labels to be on my lightly hand dyed fabrics. Sometimes I print directly on the fabric, I also have an Epsom, but hate having fabric get stuck!
Thank you for your ideas,,, have not tried doing it with all the steps… I just type mine up in Word, and go from there… I am trying to get better at inventory, and saving a photo of my art work and putting it in a list… I forget what I name something, be it gourd, jewelry or fiber art…