• Skip to primary navigation
  • Skip to main content
  • Skip to primary sidebar
  • Skip to footer
  • Email
  • Facebook
  • Instagram
  • YouTube
Serendipity and the Art of the Quilt

Serendipity and the Art of the Quilt

Creating with Brenda Gael Smith

  • WEBSITE
  • About
    • Biography
    • Resume
  • Gallery
    • Serendipity Gallery
    • Contemporary Textile Art
    • Monthly Art Project 2019
    • Weekly Art Project
  • Workshops & Programs
    • Overview
    • Workshops Brochure
    • 3 Hour Zoom Workshops
    • Schedule
    • Lectures & Programs
    • Abstraction from Reality
    • Bound to Please
    • Creating with Felt
    • Circular Explorations
    • Improvisation Plus
    • Lines of Beauty
    • Logs & Ladders
    • The Modern X
    • Shibori Serendipity
    • Stacks of Improvisation
    • Strata Various
    • Terms & Conditions
  • Resources
    • Copyright Resources
    • Tutorials
    • Web Design
  • News/Events
    • Calendar
    • Newsletter Sign Up
    • World Quilt Australia
  • Blog
  • Contact

Continuous Binding Without Bulges

1 April 2008 Filed Under: Technique:Finishing, Tutorials, Twelve by Twelve

“My People” by Brenda Gael SmithMy community themed quilt My People is now on the Twelve by Twelve group blog. As obsessed as I am with alternative finishes, there will always be a place for a classic continuous binding with mitred corners.

Here is my tutorial (with clickable photos) to show you how to avoid unsightly lumps and bulges where the two ends of your binding meet.

Binding Strip Preparation: Cut your binding strips the desired width. (l like to use 2in strips for a 1/4in binding but this is a very personal thing!) If you have multiple strips, join them with 45 degree seams. Press the seams open to help distribute the bulk. Press the binding in half lengthwise with the wrong sides together.

Quarter Inch Seam First Corner Mitre Second Corner Mitre

  1. Using your walking foot and starting midway along one side of the quilt, stitch the binding to the front of the quilt-top edge, matching the raw edges. I use a quarter inch seam and stop (and back stitch) 1/4in from the corner. Make sure you leave a tail on the binding of at least four inches (see photo/step 5 below).
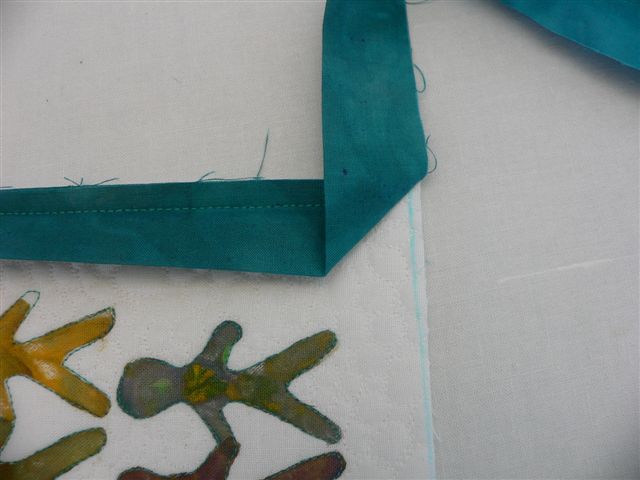
  2. At the corner, fold the binding strip up at a 45 degree angle. Finger press.
  3. Then fold the binding strip straight down so that it is aligned with the next side of the quilt to make a neat corner. This will make a mitred corner when the binding is folded to the back.

Stitching Line Wriggle RoomChalk Line I

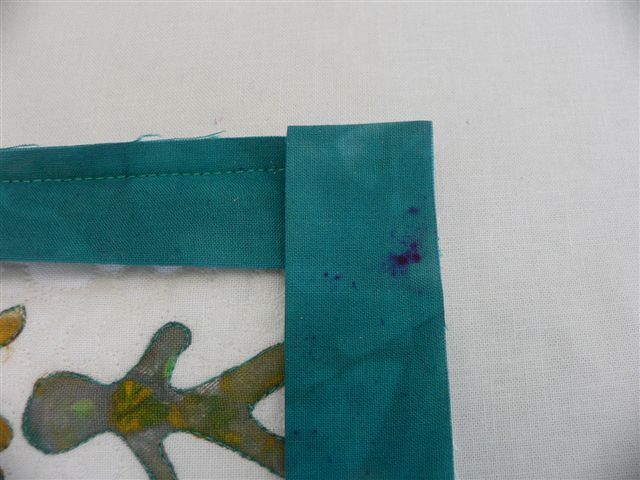
  1. Continue stitching, either starting from the edge or, as I have done here, in by 1/4 inch.
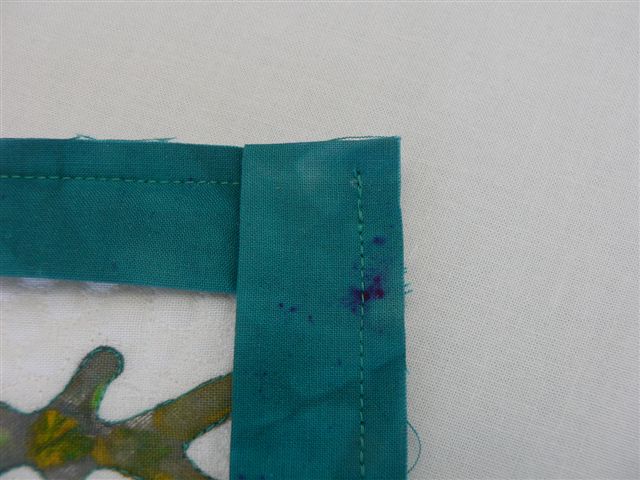
  2. On the final side, leave an unstitched gap of 8-10 inches so that you can easily work with the tails.
  3. Lay one tail flat and, at the end of the tail, chalk mark a line equal to the total width of your binding (in my case, 2 inches).

Chalk Line II Join Right Side to Right Side at Right Angles Stitching Line

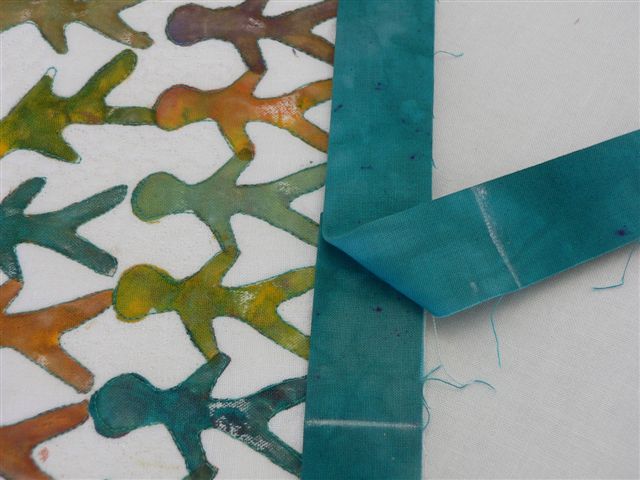
  1. Lay the second tail flat (and very slightly stretched) so that it overlaps with the first tail. The chalk line on the first tail will dust off onto the second tail. Trim the second tail at the chalk line.
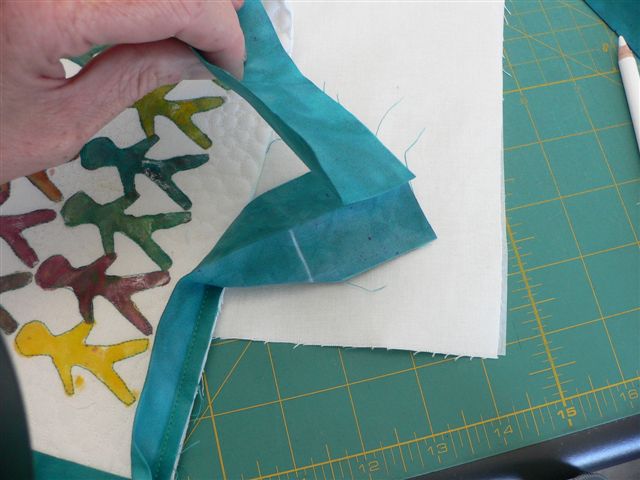
  2. Open out the ends of the tails and pin them together right sides together at right angles.
  3. Mark a stitching line at a 45 degree angle across the corner. Sew along the marked stitching line.

Final JoinFinal Join from Front

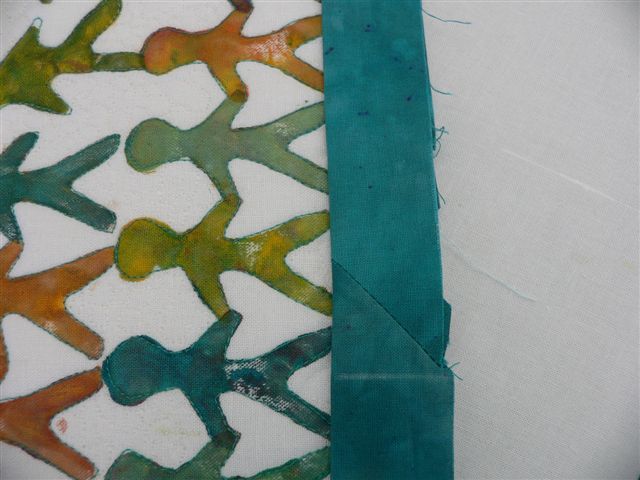
  1. Trim the seam and press the seam open to distribute the bulk. Lay the binding flat and stitch down to complete the binding.
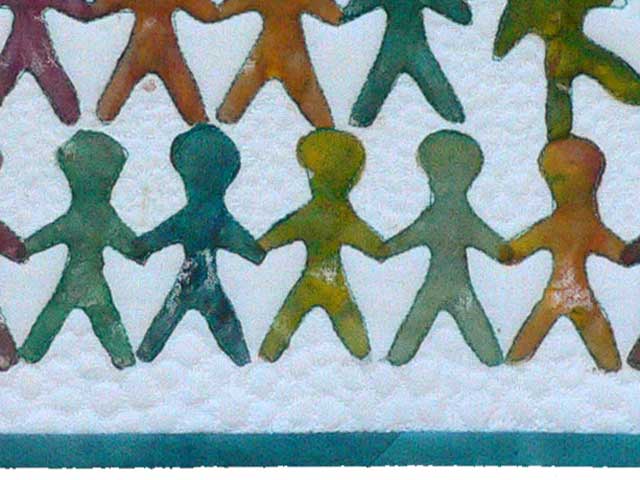
  2. Turn the folded edge of the binding over to the back of the quilt and slipstitch it into place.* Look! The join hardly shows up!

*Alternatively, you may like to sew the back down by machine.  See:

  • Red Pepper Binding Tutorial by Rita Hodge
  • Machine Binding Tutorial by Melody Johnson

Reader Interactions

Comments

  1. Kristin L says

    1 April 2008 at 5:55 PM

    I bound four quilts just like this in the last week. It’s a classic finish. I was going to do a tutorial too (took the pics and everything) but you just saved me from all the writing. Well done 🙂

  2. Amy says

    2 April 2008 at 9:31 AM

    Argh, I’d go blind stitching round the little people!

  3. Naomi says

    4 April 2008 at 7:18 AM

    Yes! I’ve been using this method for years and have had other quilters look round and round the binding, without being able to tell where it’s finished.

  4. Ariel Gill says

    4 April 2008 at 11:10 PM

    Thanks so much for giving us this CLEAR instruction on how to make binding look fabulous!

    Ariel

Primary Sidebar

Blog Posts Straight to Your In Box

Enter your email address:

Vision 2020 - a travelling textile art exhibition curated by Brenda Gael Smith

Blog Archives

Serendipity Studio Newsletter

Categories

Recent Posts

  • Moonlighting: Upcoming Serendipity Workshops
  • Serendipity Workshops: Expanded 2021 Schedule with Europe-friendly times
  • The New Quilt 2021
  • Learn with Brenda in 2021!
  • Abstraction in Action

Footer

Contact

Brenda Gael Smith
brenda@serendipitypatchwork.com.au

PO Box 4033, Copacabana
NSW 2251 Australia

Tel: +61 412530190

Serendipity Studio News

Sign up for periodic updates from my studio - new artwork, exhibitions and other news

  • Email
  • Facebook
  • Flickr
  • Instagram
  • Pinterest
  • YouTube

New on Instagram

I the past six months I have made countless journe I the past six months I have made countless journeys to Hawkesbury Regional Gallery in connection with The New Quilt exhibition. My favourite ritual has been to take the scenic route via Berowa Waters and the bucolic Hawkesbury countryside. The exhibition has now closed and yesterday’s ferry crossing was in perfect conditions. #scenicroute #thenewquilt #thenewquilt2021 #berowrawaters #takethelongwayhome
#Repost @globalquiltconnection with @get_repost
・・・
🌟Time for 3 more preview photos for the May 22nd-23rd All Star Virtual Sampler Platter.🌟

Check out these all-star presenters and their fabulous quilt demo topics scheduled for May 23rd, 3-6 PM Eastern Time:

⭐ Lisa Shepard Stewart @culturedexpressions
Ankara Folded Hexie Blocks and Projects

⭐ Ana Buzzalino @ana_buzzalino
Paintstiks on Fabric with Stencils and Rubbing Plates

⭐ Brenda Gael Smith @brendagaelsmith
Piecing Freeform Banded Triangles

Register on the Global Quilt Connection website under guild resources. Open to guilds and individual quilters!!

#globalquiltconnection #onlinequilteducation #onlinequiltinspiration #virtualquiltworkshops #virtualquiltlectures #onlinequiltworkshops #onlinequiltlectures #onlinequiltteachers #quilting #quilt #quiltersofinstagram #modernquilt #modernquilting #allstarvirtualsamplerplatter #quiltingdemos #sewing #sew #foldedhexie #hexieblocks #painstiks #surfacedesign #improvpiecing #improvtriangles #brendagaelsmithworkshop #brendagaelsmith

Copyright © 2003–2021 All Rights Reserved · Brenda Gael Smith